Today I finished off my choker!
Code
There was an effect I wanted to add from Scott Marley’s FastLED effects page, the effect ‘twinkles’ the LEDS using colours from a user defined palette. The palette I used had blue green colours but when I uploaded the code, the LED looked like this:
They were flashing sporadically in all sorts of colours. After a few hours of trying everything code based to get it to work I finally changed the LED count (which I realise should have been one of the first things I tried!). Reducing the number of LEDs to 30 from 38 and the pattern worked perfectly. As I increased the number of LEDs the glitches increased. So it’s another memory limitation with the ATTiny85 and another microcontroller needs to be used if I wanted to use that many LEDs in that pattern. For my choker design, it was fine to chop off the 8 LEDs.
Perfboard
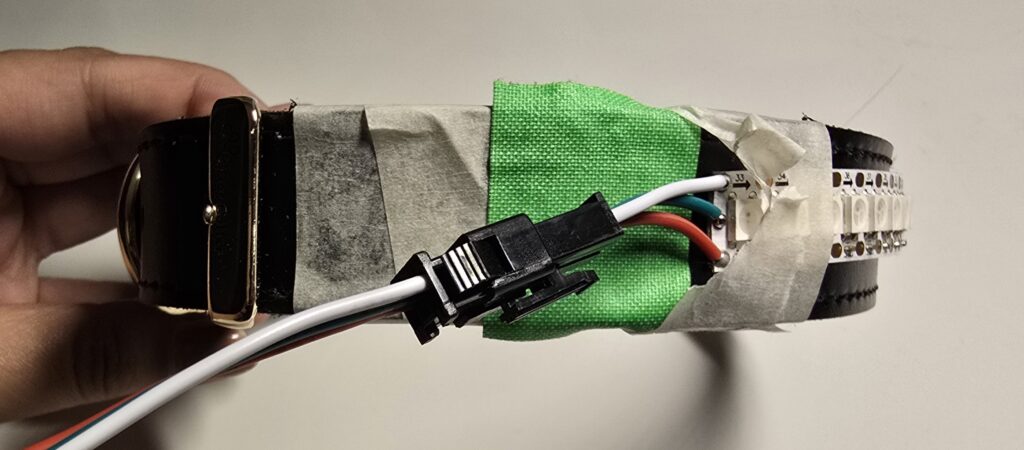
I first started by placing my LED tape on the choker material itself (with some masking tape as I didn’t want it to go on permanently at this point) and marking out where and how big my perfboard should be.
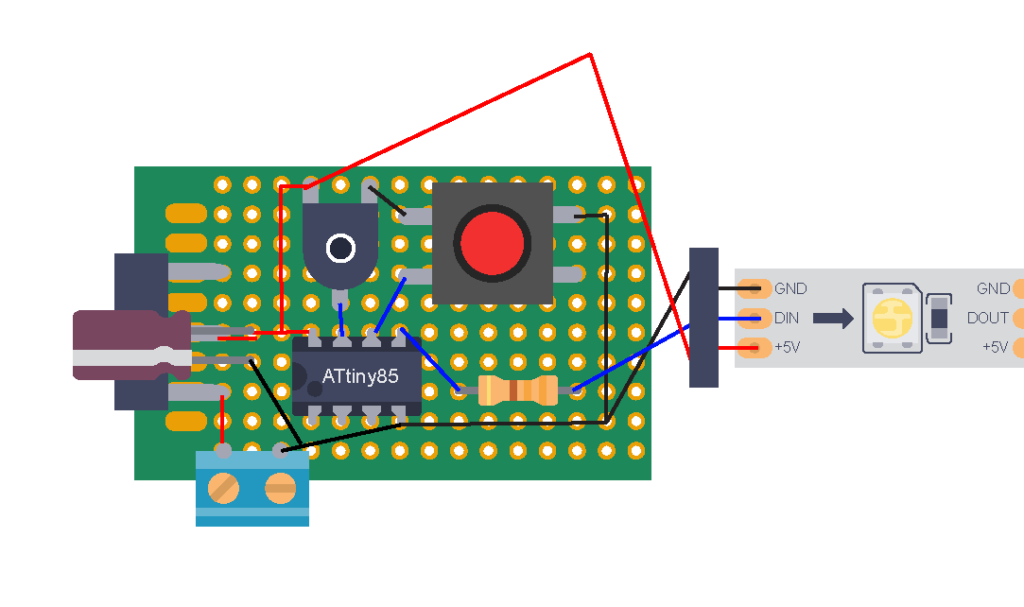
Here’s my perfboard sketch.
And my completed perfboard.
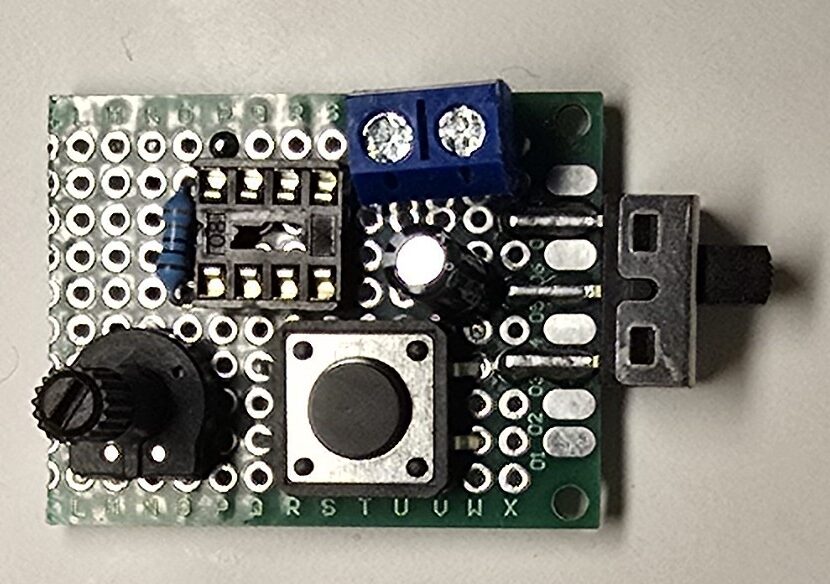

As you can see, I slightly rearranged the components on the board so that I could fit it all into a smaller footprint but the connections are the same. I used 24 AWG solid tinned wire as my jumper wires – it has a max current rating of around half an amp, which is over my max current draw of 430mA. This was my first time soldering on to perfboard and I found it really fun! There are a few things I learnt from the process e.g. start with the smallest/flattest components and then build yourself up from that.
Power
I powered up my perboard and it worked perfectly… for about 15 seconds. Turned out that the bog-standard power bank I was using (the sort that you charge your phone with etc.) not only has a maximum current but a minimum current rating i.e. it will turn off if it detects too little charge being pulled. There were a couple of different options I could have solved this with:.
- Use a Power Bank Keep Alive. It periodically sends a current pulse to the powerbank to well… keep it alive.
- Use batteries combined with either a step up or resistor/step down converters attached depending on the voltages of the batteries used to get to 5V.
- Or use a power bank that doesn’t have a minimum current limit. Luckily I have a TalentCell so that’s the option I went for.
The TalentCell worked perfectly however it is a little bulky compared to my slim phone powerbank so if I planned to wear the choker out and about I would probably invest in either option 1 or 2.
Diffusion
I wanted the LEDs to be slightly diffused. I found this super cool Youtube video by Erin St Blaine who shows how lots of different materials diffuse LED tape at various distances, a very useful reference.
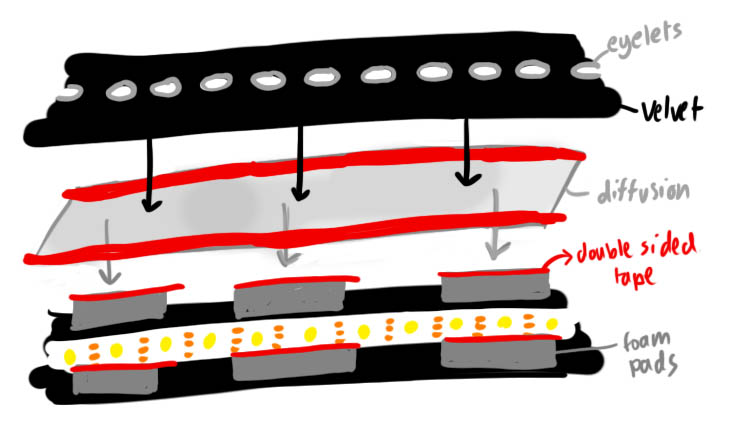
However I happened to have some scraps of diffusion paper from work so I used that. In order to create some distance, I stuck some foam pads on either side of the tape on the choker, creating a raised ‘rail’ that I then stuck the diffusion paper on. I did some tests first on how high I wanted the ‘rails’ to be.
The foam pads were actually cheap sticky furniture pads from Poundland that I cut up to the right size and they worked pretty well.


Finishing the Choker
Next was wrapping the velvet around everything. Firstly I added eyelets to the fabric to allow the LEDs to shine through.
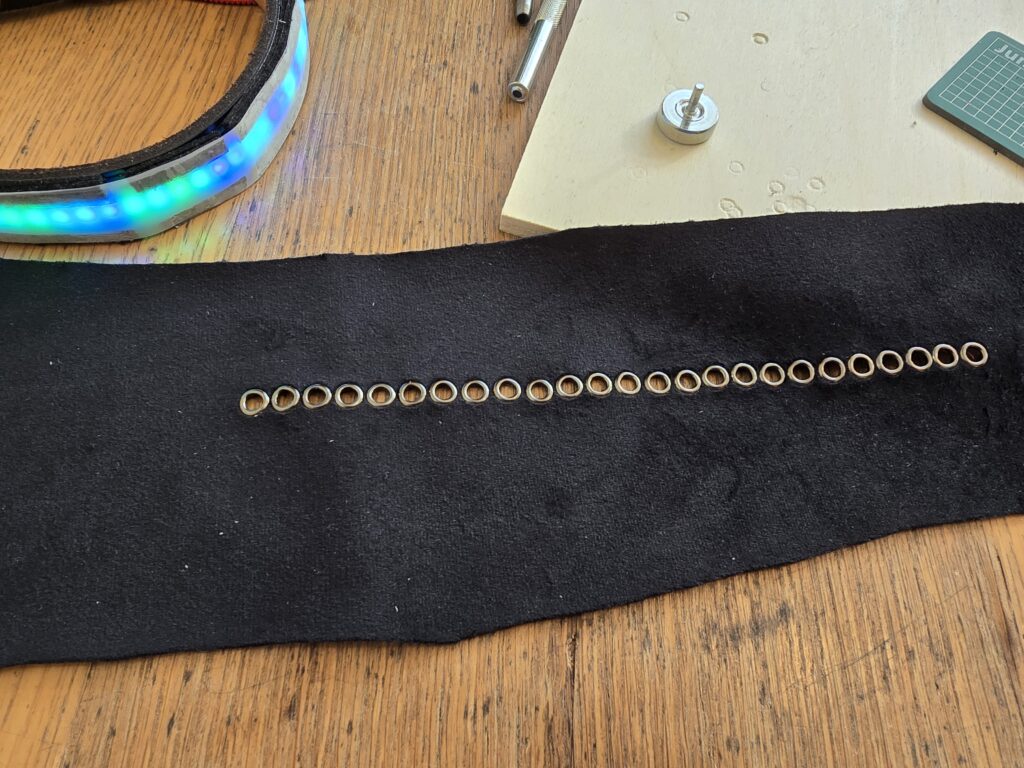
There were a few issues. Firstly I should have put a bit of masking tape or used a ruler to ensure the line of holes was straight as I did it by eye and it was a bit wonky.
Secondly, the punch I used didn’t seem to be sharp enough so I couldn’t punch a hole cleanly through the fabric, it was quite time consuming to cut the holes with a blade and scissors. There are other hole punch tools i could explore in the future.
Thirdly and the largest issue for me was that the holes didn’t exactly align over the LEDs, as you can see here, some of the holes are positioned over a gap. It’s only noticeable from close up but I definitely want to rectify it if I make another choker. I placed the eyelets as close as physically possible so I think I would have to get smaller eyelets so they can be placed closer together or get a tape with a lower LED density.
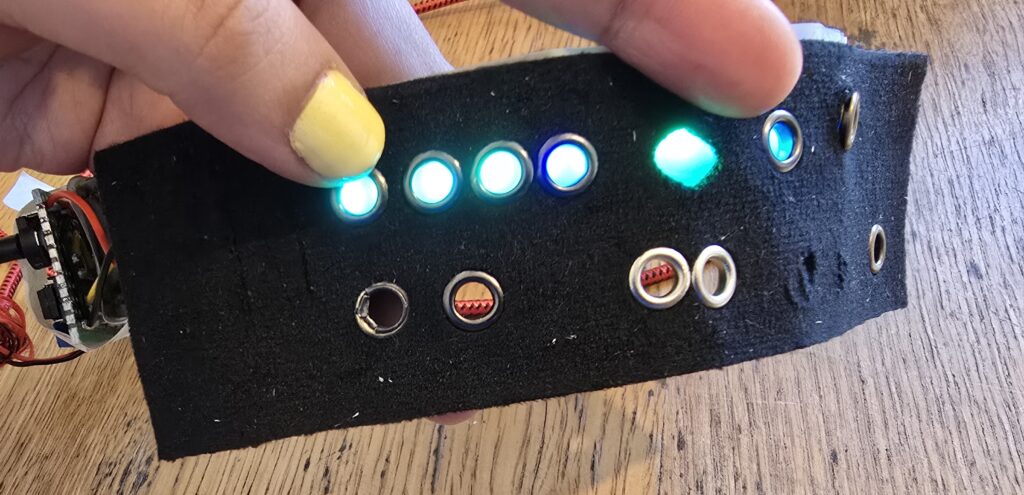
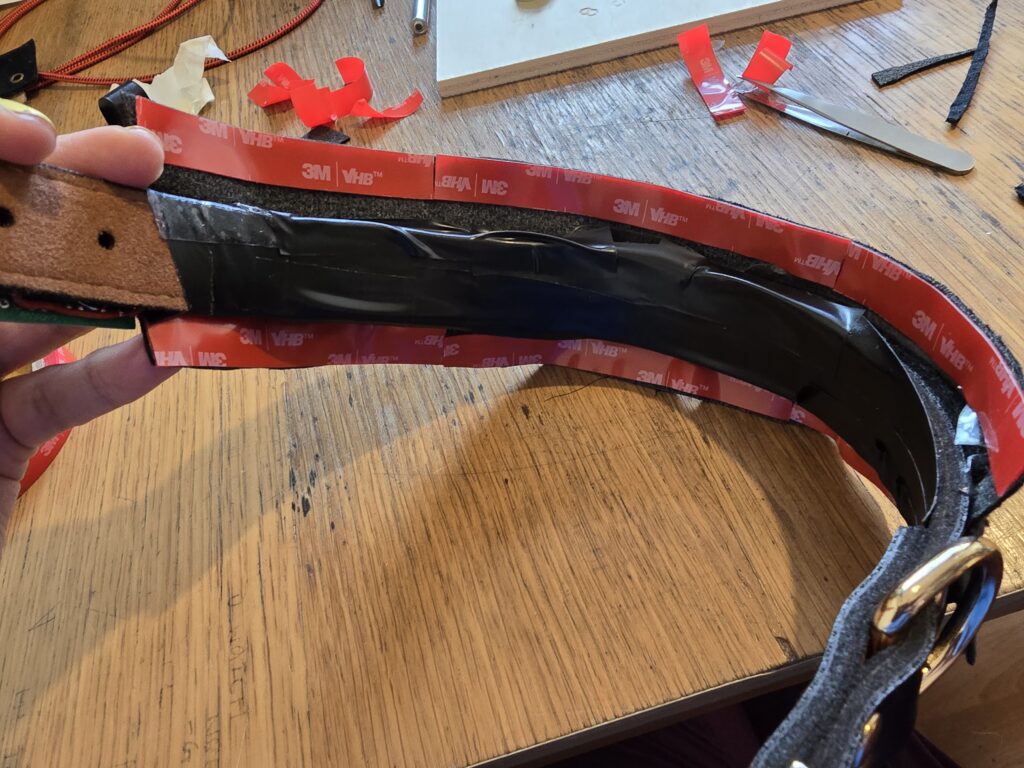
I then used a combination of double sided and electrical tape to fix the velvet around my choker. I made a really silly mistake where I cut the velvet too short to wrap around the choker but I made it work. I think in the future I’d like to sew it in place so it’s a better looking finish.
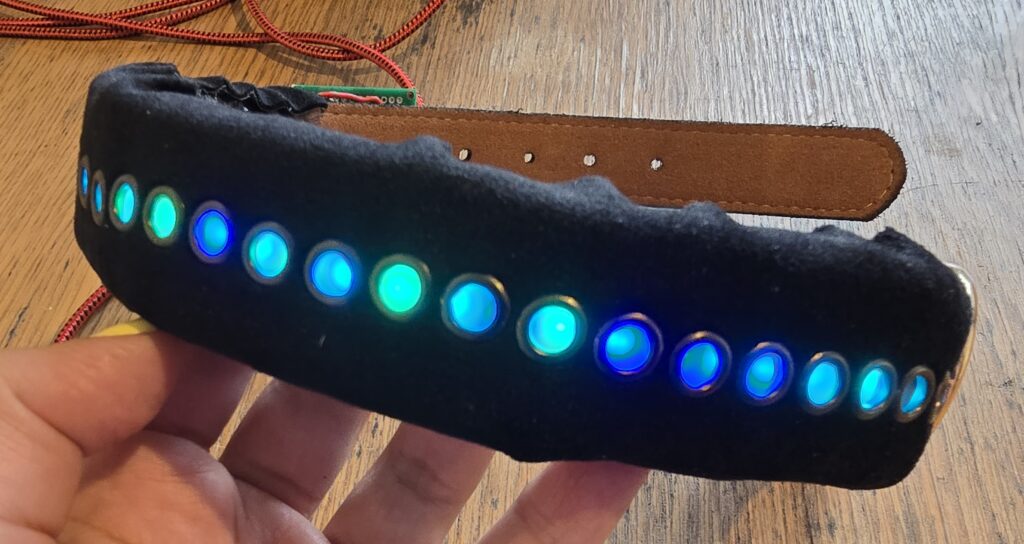
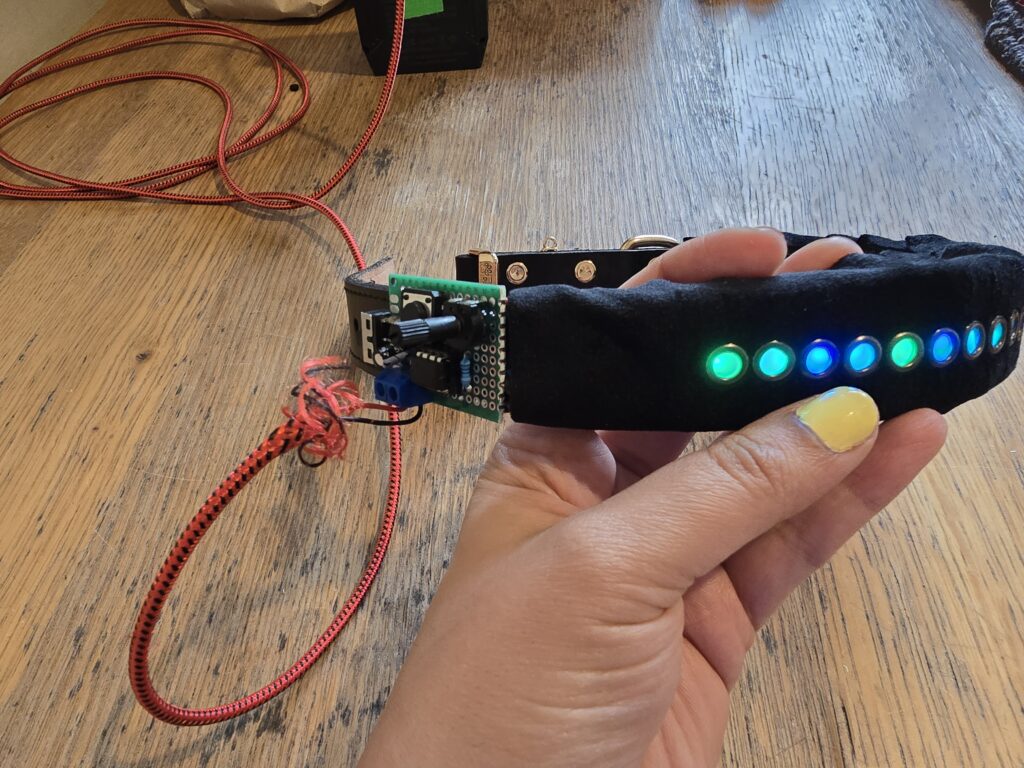
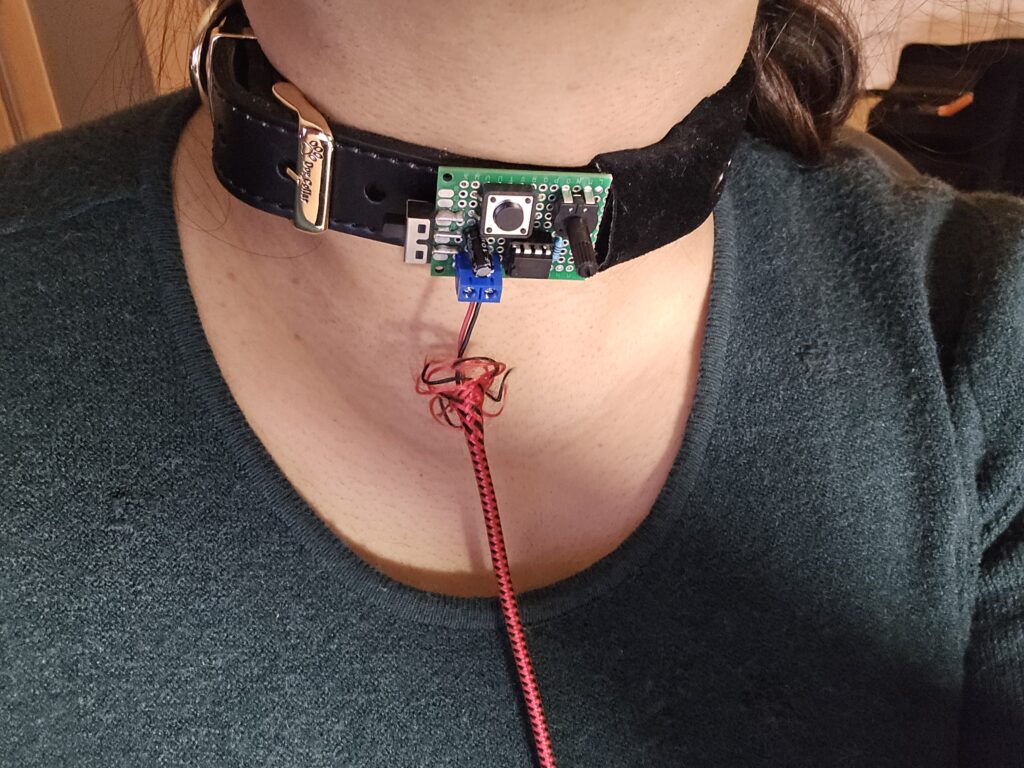
And here I am wearing my choker! I cycle through the patterns, change the brightness and turn off the device. It was very comfortable wearing it and fairly easy to put on. I thought that the perfboard parts might get stuck in my hair or be uncomfortable but I didn’t even notice them.
Conclusion
All in all, I think my project was a great success and I think the final product looked good when I wore it. If I made this again, I would spend a bit more time finishing it properly e.g. making sure there are no bumps in the fabric and the eyelets are properly aligned.
Although I liked the tactile nature of the buttons and pot, it’s not very convenient taking the ATTiny85 out of its holder and reprogramming it with different patterns. Plus as my memory issues show, the ATTiny85 lacks the space for a lot of patterns and I like the idea of changing the patterns/colours really easily, e.g. to match a new dress or your makeup. I think using a combo of WLED on an ESP32 might be better for this functionality.
I’d like to look into sound reactivity, I think it would be fun to wear a choker like this clubbing and for it to react to the music – again WLED has some functionality for this.
I was nervous about the power wires ripping out from the screw terminals and it’s a bit of a pain unscrewing them. I’d like to replace this with a USB-C connector. There are lots of cheap breakout boards available for this.
The perfboard was completely unprotected, so next time I’d cover the electronics to make it weather/sweat proof.
I have lots of ideas for my next choker prototype so watch this space!

